Clothing Manufacturing Simplified : A Step by Step guide to Onshore Clothing Production
Apparel manufacturing and clothing production can be divided into 6 straightforward steps. From the origination of inspiration and idea to restocking inventory, let's delve into how these processes play a role in building your ideal fashion brand.
-
INSPIRATION
Begin your fashion dream by not only finding inspiration but also understanding what you as a designer like and don’t like. It may sound basic and straight forward but knowing the type of designer or brand you wish to be will help you in developing cohesive ideas moving forward.
You can collate inspiration in the form of a Pinterest board, scrap book or even drawing.
Let yourself explore your creativity and develop a signature idea inspired by your unique preferences and ideas.
This is arguably one of the more difficult tasks in your journey so allow yourself some time to achieve this well. A clear brand identity will provide endless benefits moving forward and it is highly recommended when moving on to designing.

KEY TIP: Inspiration can be found everywhere! Look outside your normal surroundings
-
DESIGN AND DEVELOPMENT
-
SKETCHES AND IDEAS
Once you are full of inspiration, it is time for you to convey your ideas in the form of clothing designs. Sketches are the preferred method of conveying ideas although if you do struggle with drawing, you may use images to reference and communicate your ideas to your production and sampling team.
At KKNW Productions, we can provide you with assistance by arranging design meets with our designer. Each designer can not only sketch your idea for you but also advise you on the viability of your idea saving you a lot of time through the sampling process.

KEY TIP: If you struggle to draw your ideas, download a croquis template from the internet. These templates act like a dummy and you can easily draw and convey your designs.
-
SOURCING MATERIALS
You have your designs laid out and a vision of how you want your collection to look. It is now time to move forward and start sourcing what materials and fabrics you intend to use. Start by requesting sample swatches and headers from your wholesale suppliers. If you are unsure about fabrics and textiles, you may begin your research in your local fabric store. This could be a good opportunity for you to feel fabric and research before approaching a wholesaler supplier.
When ordering new fabric for the first time, we recommend you request either a sample or small amount to test during your sampling stage. This allows you to completely test your product without the risk of over ordering stock. You may find after sampling, your choices in materials and fabrics may have to change and you could find yourself sampling different fabrics until landing on the right one.

KEY TIP: Order fabric samples while in sampling stage. Only commit to stock fabric if you are absolutely certain you intend to continue with it throughout production.
-
SKETCHES AND IDEAS
-
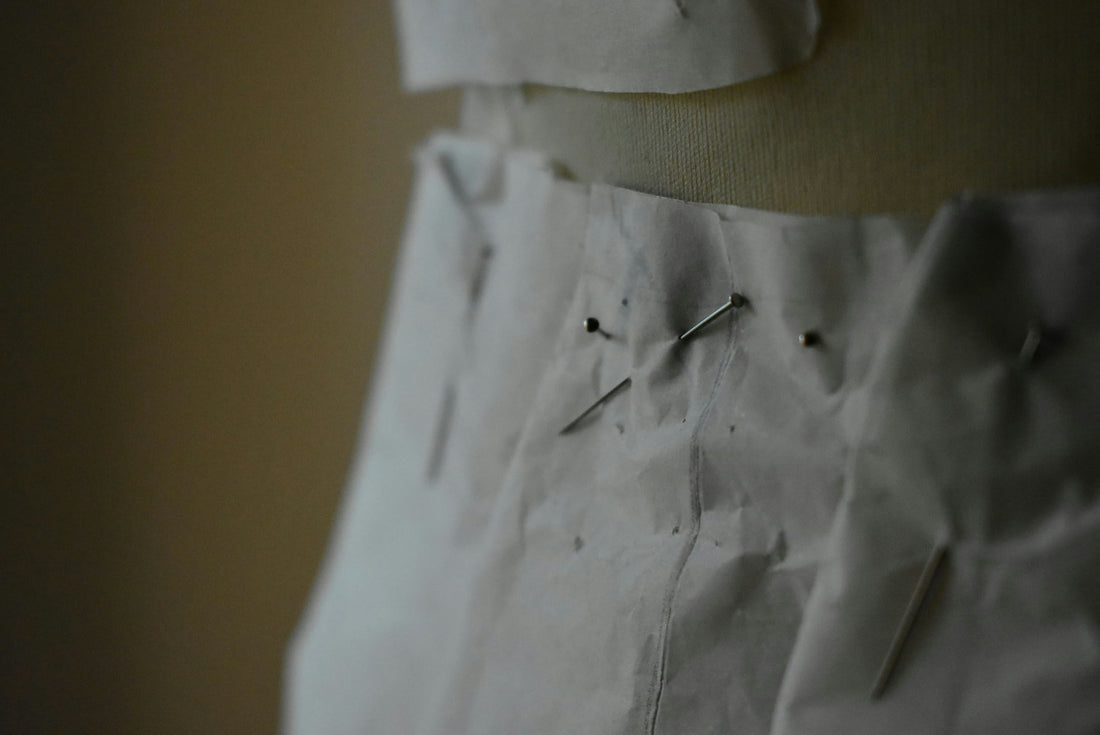
SAMPLING
During this phase, you will begin testing your designs and materials in order to see whether they work to achieve your intended look. This is also when you will begin drafting your initial pattern, generally in your chosen sample size.
From your sketches, your pattern maker will draft an initial pattern which will then be used to create your first pattern otherwise known as a toile. After this process, you will be invited to have a fitting with your fit model. Your fit model must be your sample size. So, ensure when you are sampling, you indicate your preferred sample size to align with your model’s standard sizing.
During your fitting, you will make notes, discuss things you like, things you don’t and make plans to either adjust or move forward with the design.
If there are any adjustments, your sample will be remade and the cycle begins again until every aspect of the sample is perfect and you are happy to proceed.

KEY TIP: Do not proceed or approve your sample until you are 100% happy with the outcome.
-
PATTERN MAKING AND SIZE GRADING
Once you have achieved your perfect sample, your pattern maker will proceed to create your patterns. This can either be completed digitally or physically on card. This is a personal preference although we do recommend digital assets as they are not so easily lost.
Your patterns will now undergo size grading to your specific size chart. This will prepare your designs for bulk production making it accessible for your makers to correctly fill your order.

KEY TIP: Make multiple copies of your patterns. If you have digital files for your patterns, ensure you make copies to ensure they are never lost. Patterns are your master blueprints, guard them with everything you have!
-
PRODUCTION
Patterns graded, sampling completed and fabric supplied, you are ready for production!
Enjoy a streamline and stress free production, as you have provided all the fundamental tools for your production team to create your product perfectly.

KEY TIP: The larger the quantity, the more cost effective each unit. Ask your production manager about single unit pricing and bulk unit pricing. Generally speaking, the higher the units the lower the cost per unit is.
-
REORDERING
You have now successfully completed producing your first range! Moving forward, you can expect to have a streamline process when reordering styles and creating new pieces. Clothing production is one of those processes that becomes a lot more easier over time.

KEY TIP: As you collect and create assets reordering and even creating new products becomes not only faster by much more easier.